

Gel X nails can make anyone feel like a glam queen, but when it’s time for a change, they can turn into a stubborn nemesis. If you’ve ever tried to remove them yourself, you know it can feel like wrestling an octopus—frustrating and messy. Don’t worry, though; there’s a way to conquer this challenge without sacrificing your sanity or your nails.
In this guide, you’ll discover the secrets to effortlessly removing Gel X nails at home. From the right tools to handy techniques, it’s all about making the process smoother than your favorite nail polish. So grab your popcorn and get ready to bid farewell to those fabulous claws—because who needs a salon appointment when you can DIY like a pro?
Understanding Gel X Nails
Gel X nails represent a popular choice in the nail enhancement world. They provide a natural-looking finish and a durable alternative to traditional acrylic nails.
What Are Gel X Nails?
Gel X nails consist of soft gel nail extensions applied over natural nails. The application process includes a pre-shaped gel tip that adheres efficiently without damaging the natural nail. They cure under UV light, creating a strong bond, and offer a lightweight feel that many users appreciate.
Benefits of Gel X Nails
Gel X nails provide numerous advantages for those seeking long-lasting results. These nails enhance the appearance of natural nails, adding length and shape effortlessly. Durability stands out, as they resist chipping and cracking better than traditional polish. They also boast a faster application time, allowing for a quicker visit to the salon. Additionally, the removal process can be simplified with proper techniques, paving the way for easy transitions between styles.
Preparing to Remove Gel X Nails
Preparing to remove Gel X nails requires the right tools and adherence to safety precautions. Proper preparation ensures an effective and less damaging removal process.
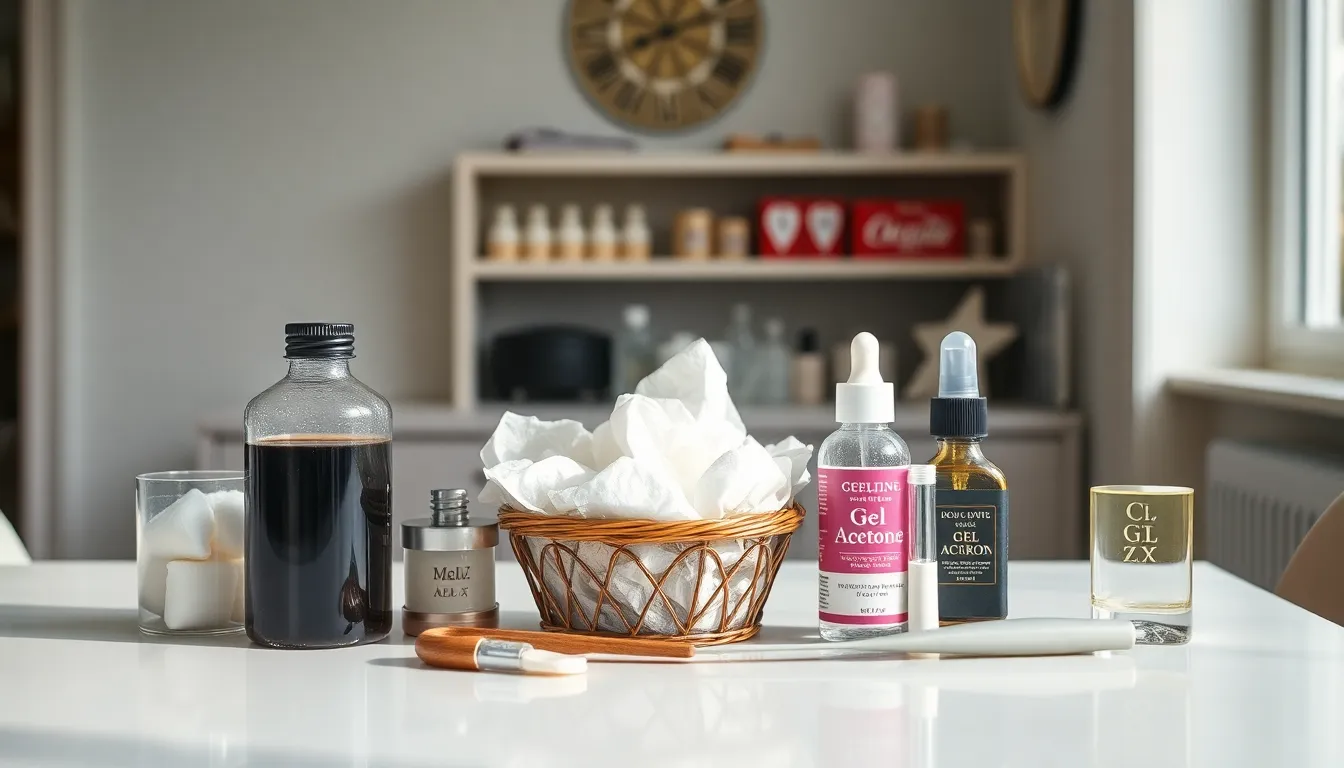
Essential Tools Needed
Gather essential tools for a successful Gel X nail removal. Acetone proves crucial, as it helps break down the gel. Cotton balls or pads assist in applying acetone effectively. Foil wraps provide a secure environment for soaking. A nail file can help gently buff the top layer of the gel, enhancing effectiveness. It’s beneficial to have cuticle oil on hand, as it aids in restoring moisture to the natural nails afterward.
Safety Precautions
Implement safety precautions to protect the natural nails and surrounding skin. First, perform a patch test with acetone to check for sensitivity. Ensure to work in a well-ventilated area to avoid inhaling fumes. Cover the skin around the nails with petroleum jelly to create a barrier against acetone. Avoid excessive filing to prevent damage to the nail bed. Monitor the soaking time closely; prolonged exposure can weaken the nails.
Step-by-Step Guide on How to Get Gel X Nails Off
Removing Gel X nails is straightforward with the right techniques. Below are effective methods to help with the process.
Soaking Method
The soaking method utilizes acetone to dissolve the Gel X nails. First, cotton balls or pads soaked in acetone cover the nails entirely. Next, wrapping each finger in foil keeps the cotton in place and helps retain heat. After soaking for about 15 to 20 minutes, checking the nails for softness is essential. If the nails feel pliable, gently push the gel off using a cuticle pusher. Being patient during this method is crucial to avoid damaging the natural nails.
Filing Method
The filing method involves using a nail file to carefully remove the Gel X surface. It starts with a coarse nail file or buffer to file the top layer, reducing the thickness of the gel. Once the shine eases, transitioning to a finer file helps smooth the edges. Then, gently prying off the gel with a cuticle pusher completes the process. Avoid excessive pressure to prevent damage to the natural nail bedding beneath.
Combination Method
The combination method merges soaking and filing techniques for a more efficient removal. Start by filing down the top layer of the Gel X nails to create a rough surface. Then, follow up with the soaking method, using soaked cotton balls and foil wraps. After soaking, the gel should lift away more easily, allowing for smooth removal. This dual approach minimizes time spent removing Gel X nails while ensuring natural nails remain intact.
Aftercare for Your Nails
Proper aftercare ensures nails recover and stay healthy after Gel X removal. Following the removal process, nourishment and protection become essential for maintaining nail strength.
Keeping Nails Healthy
Regular moisturization promotes strong, healthy nails. Applying cuticle oil daily offers hydration and prevents dryness. Consider using a nail strengthener to reinforce the natural nails, providing added resilience against future damage. Avoid exposing nails to harsh chemicals or excessive water to minimize wear. Maintaining a balanced diet rich in vitamins and minerals can also support nail growth and health. Biotin supplements may enhance nail strength and reduce brittleness. Perform gentle hand and nail massages to improve circulation and encourage growth.
Recommended Products
Utilizing the right products aids in nail recovery. Cuticle oil enriched with natural ingredients, like jojoba or vitamin E, provides deep hydration. Nail strengtheners containing proteins restore nail integrity, making them less prone to breakage. Acetone-free remover products offer gentle alternatives for future nail treatments. Each brand varies, but choosing formulations with nourishing extracts can enhance effectiveness. Moisturizing hand creams play a crucial role in keeping the skin around the nails soft. Incorporating these products into a routine ensures long-lasting nail health and beauty.
Removing Gel X nails doesn’t have to be a daunting task. With the right tools and techniques anyone can achieve a successful DIY removal. Emphasizing patience and care throughout the process is crucial for maintaining the health of natural nails.
After removal proper aftercare is just as important. Regular moisturization and the use of nail strengtheners can help rejuvenate nails and promote growth. By following the outlined steps and tips readers can confidently transition between styles while keeping their nails healthy and beautiful.


